
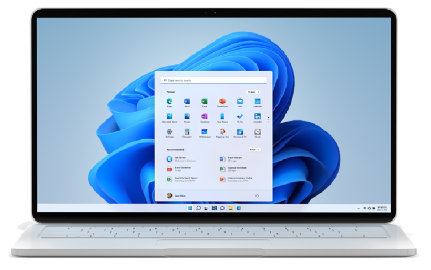
Download Windows 11
(Current release: Windows 11 2023 Update l Version 23H2)
There are 3 options below for installing or creating Windows 11 media. Check out each one to determine the best option for you.
Before installing, please refer to the PC Health Check app to confirm your device meets the minimum system requirements for
Windows 11 and check the Windows release information status for known issues that may affect your device.
Windows 11 Installation Assistant
This is the best option for installing Windows 11 on the device you’re currently using. Click Download Now to get started.
-
This assistant is for those who wish to:
- Upgrade a Windows 10 PC to Windows 11.
Before you begin, check to see if the following conditions apply to you:
- You have a Windows 10 licence.
- Your PC must have Windows 10, version 2004 or higher installed to run Installation Assistant.
- Your PC must have 9 GB of free disk space to download Windows 11.
Note: Your PC meets the Windows 11 device specifications for upgrade requirements and supported features. Certain features require additional hardware. We also recommend that you visit your PC’s manufacturer’s website for information about updated drivers and hardware compatibility.
After you download the Installation Assistant:- Select Run. You need to be an administrator to run this tool.
- Once the tool confirms the device hardware is compatible, you will be presented with the licence terms. Select Accept and Install.
- Once the tool is ready, click the Restart Now button to complete installation on your computer.
- It might take some time to install Windows 11, and your PC will restart a few times. Make sure you don’t turn off your PC.
Note: Windows 11 Installation Assistant doesn’t run on ARM-based PCs. It’s only supported for PCs using x64 processors. If you need installation media to install Windows 11 on a different PC, see Create Windows 11 Installation Media.
Create Windows 11 Installation Media
If you want to perform a reinstall or clean install of Windows 11 on a new or used PC, use this option to download the media creation tool to make a bootable USB or DVD.
-
To get started you first need a licence to install Windows 11 or have a Windows 10 device that qualifies for an upgrade to Windows 11.
Make sure you have:
- An internet connection (internet service provider fees may apply).
- Sufficient data storage available on the computer, USB or external drive you are downloading the .iso file to.
- A blank DVD disc with at least 8GB (and DVD burner) to create a bootable disc. We recommend using a blank USB or blank DVD, because any content on it will be deleted during installation.
- If you receive a “disc image file is too large” message while attempting to burn a DVD bootable disc from an ISO file, consider using a higher capacity Dual Layer DVD.
Ensure the PC you want to install Windows 11:
- Has a 64-bit CPU: Windows 11 can only run on 64-bit CPUs. To see if your PC has one, go to Settings > System > About, or search “System Information” in Windows and look under “System Type.”
- Windows 11 Media Creation Tool creates installation media only for x64 processors. For ARM-based PCs, you should wait until you are notified through Windows Update that the upgrade is ready for your PC.
- Meets system requirements: Not all devices running Windows 10 are eligible to receive a Windows 11 upgrade. See the Note below with the link to: Windows 11 device specifications for upgrade requirements and supported features. Certain features require for additional hardware.
- WARNING: Installing Windows 11 media on a PC that does not meet the Windows 11 minimum system requirements is not recommended and may result in compatibility issues. If you proceed with installing Windows 11 on a PC that does not meet the requirements, that PC will no longer be supported and won't be entitled to receive updates. Damages to the PC due to lack of compatibility aren't covered under the manufacturer warranty.
- Matches your current language: You'll need to choose the same language when you install Windows 11. To see which language you're currently using, go to Time & language in PC settings or Region in the Control Panel.
Note: See the Windows 11 device specifications for upgrade requirements and supported features. Certain features require additional hardware. We also recommend that you visit the website of your PC manufacturer for information about updated drivers and hardware compatibility.
Using the Media Creation Tool to create installation media:- After downloading, run the media creation tool. You need to be an administrator to run this tool.
- If you agree to the licence terms, select Accept.
- On the What do you want to do? page, select Create installation media for another PC and then select Next.
- Select the language, edition and architecture (64-bit) for Windows 11.
- Select which media you want to use:
- USB flash drive: Attach a blank USB flash drive with at least 8GB of space. Any content on the flash drive will be deleted.
- ISO file: Save an ISO file to your PC. This can be used to create a bootable DVD. After the file is downloaded, you can go to location where the file is saved, or select Open DVD burner, and follow the instructions to burn the file to a DVD.
After the installation media is created, follow the steps below to use it.
- To check for updates now, select the Start button, and then go to Settings > Windows Update and select Check for updates. You may also wish to visit your device manufacturer’s support site for any additional drivers that may be needed.
Note: Drivers for Surface devices may be found on the Download drivers and firmware for Surface page.
Before you install Windows 11, it’s a good idea to save any work and back up your PC before you start. If you used the Media Creation Tool to download an ISO file for Windows 11, remember to burn it to a DVD before following these steps:
- Attach the USB flash drive or insert the DVD on the PC where you want to install Windows 11.
- Restart your PC.
- If your PC does not automatically boot to the USB or DVD media, you might have to open a boot menu or change the boot order in your PC's BIOS or UEFI settings.
- To open a boot menu or change the boot order, you'll typically need to press a key (such as F2, F12, Delete or Esc) immediately after you turn on your PC. For instructions on accessing the boot menu or changing the boot order for your PC, check the documentation that came with your PC or go to the manufacturer's website.
- If you do not see the USB or DVD media device listed within the boot options, you may need to reach out to the PC manufacturer for instructions for temporarily disabling Secure Boot in your BIOS settings.
- If changing the boot menu or order doesn't work, and your PC immediately boots into the OS you want to replace, it is possible the PC had not fully shut down. To ensure the PC fully shuts down, select the power button on the sign-in screen or on the Start menu and select Shut down.
- On the Install Windows page, select your language, time and keyboard preferences and then select Next.
- Select Install Windows.
Important Note: If you made changes to the boot order in step 2, you may face a scenario where the initial Install Windows page will display after the installation process is complete. To resolve this, you will need to revert the changes you made to the boot order. This ensures that the internal drive you just installed Windows on will boot normally.
Download Windows 11 Disk Image (ISO) for x64 devices
This option is for users that want to create a bootable installation media (USB flash drive, DVD) or create a virtual machine (.ISO file) to install Windows 11. This download is a multi-edition ISO which uses your product key to unlock the correct edition.
-
Make sure you have:
- An internet connection (internet service provider fees may apply).
- Sufficient data storage available on the computer, USB or external drive you are downloading the .iso file to.
- A blank DVD disc with at least 8GB (and DVD burner) to create a bootable disc. We recommend using a blank USB or blank DVD, because any content on it will be deleted during installation.
- If you receive a “disc image file is too large” message while attempting to burn a DVD bootable disc from an ISO file, consider using a higher capacity Dual Layer DVD.
Ensure the PC you want to install Windows 11:
- Has a 64-bit CPU: Windows 11 can only run on 64-bit CPUs. To see if your PC has one, go to Settings > System > About , or search “System Information” in Windows and look under “System Type.”
- Meets system requirements:
Not all devices running Windows 10 are eligible to receive a Windows 11 upgrade. See the Note below for details.- WARNING: Installing Windows 11 media on a PC that does not meet the Windows 11 minimum system requirements is not recommended and may result in compatibility issues. If you proceed with installing Windows 11 on a PC that does not meet the requirements, that PC will no longer be supported and won't be entitled to receive updates. Damages to the PC due to lack of compatibility aren't covered under the manufacturer warranty.
Once the download completes you can use the Verify your download option to ensure the integrity of the file.
Note: See the Windows 11 device specifications for upgrade requirements and supported features. Certain features require additional hardware. We also recommend that you visit the website of your PC manufacturer for information about updated drivers and hardware compatibility.
Installation instructions (DVD):
- Locate the folder where you downloaded the Windows 11 ISO to.
- To use Windows Disk Image Burner to create the installation DVD, right-click on the ISO file and select Properties . Under the "General tab", click "Change..." where it says, "Opens with:" and select Windows Explorer. Select Apply . This will enable the Burn disc image to display when you right-click on the ISO file.
- To use a third-party DVD burning program, you can right-click on the ISO file and select Open with .
Installation instructions (ISO):
- If you want to install Windows 11 directly from the ISO file without using a DVD or USB flash drive, you can do so by mounting the ISO file. This will perform an upgrade of your current operating system to Windows 11.
- To mount the ISO file:
- Go to the location where you downloaded the ISO file. Then, right-click the ISO file and select Properties .
- On the "General" tab, click "Change…" where it says, “Opens with:" and select Windows Explorer for the program you would like to use to open ISO files and select Apply .
- Right-click the ISO file and select Mount .
- This will create a “virtual” bootable disc. Double-click on it to view the files within. Double-click setup.exe to start Windows 11 setup.
Select the product language
You'll need to choose the same language when you install Windows. To see which language you're currently using, go to Time and language in PC settings or Region in Control Panel.
Download – {{GetProductDownloadLinksBySku.ProductDownloadOptions.0.LocalizedProductDisplayName}}
-
If you would like to verify the data integrity and authenticity of your download, you can follow these steps:
- Download the desired product ISO file and follow the installation guidelines.
- Launch Windows PowerShell. If you need help finding the location of PowerShell for your operating system, get help in finding the location of PowerShell here: Get Help in finding the location of PowerShell.
- In PowerShell, compute the hash value for the ISO file you downloaded using the Get-FileHash cmdlet. For example:
Get-FileHash C:\Users\user1\Downloads\Contoso8_1_ENT.iso
- If the SHA256 output matches the value in the below table, for the product that you downloaded, this confirms that the file has not been corrupted, tampered with or altered from the original.
Get additional information on the Get-FileHash command.
Hash values for the ISO files for each language
Hash values for the ISO files for each language Country locale Hash code Arabic 64-bit 5E7E5CCF9452E0CF7867931BDA0FB236E5DFBFC4835504FF5E47577D0DF0DF7A Bulgarian 64-bit 54530A0B2C194B79F7B718FEFCA1FE842C849EEFEDFBBAAF2BC9D1A588A83507 Chinese Simplified 64-bit 953F9ECD3307A92FB5DAF12E3FE05603FE63181F6ABC0B08B42E632E09510E39 Chinese Traditional 64-bit 4618D5DBFCA36C2A66EEC8A3E7BA3F1C10F74BBBC98C7111D994BE436AD4B379 Croatian 64-bit EF07A4FA11545937EA2C2A4BC889D95545956EFA690C59689C7FB1942F9D331D Czech 64-bit CB3380DC681A62D477995A8F7DCA26484E3C96D94F0719A0EB0A9A72C8057D2D Danish 64-bit CA2CFE0CDB664FD1A35577F4A575A1F47FDF08B2C67318B6887E260C6CB62755 Dutch 64-bit 694D11BA2FA07FAA7AC67559B8069E0D336723CC83F6DC71799DAB878AC1C329 English 64-bit 36DE5ECB7A0DAA58DCE68C03B9465A543ED0F5498AA8AE60AB45FB7C8C4AE402 English International 64-bit 705AC061688FFD7F5721DA844D01DF85433856EAFAA8441ECE94B270685CA2DB Estonian 64-bit 5CE2B65115C2F8B50508D3B372E476947E91A39B74DEBEECC0AB9D55EE8B0475 Finnish 64-bit B25B0EE85437825C5BDA15B87360262F61420C4F863C148DF84C72FF38875722 French 64-bit E9E89DB9BE21370FC09750747903CE34189C1656D54E5624E14B70ACB1869674 French Canadian 64-bit FBAE84D2827EF9E2CF0D0E8BA20A336934B8861EE6FA5784654F129CA6BE33C3 German 64-bit 9BD27FD71714D7458D88B537DB74DE115CE7585FCD78783ED38D96A544017B68 Greek 64-bit 7253C3FA83EADB15180193779E06A754731C40B49A1BDFBB1C14EC860A4AA6EB Hebrew 64-bit 88AE7E7C9D12DBCC744E8BD62AEFF4E5B7805FFC62117EF24AC02A7F0391AEA4 Hungarian 64-bit A6DBD39395C43AAFA0671CD4587CCE43711FD5B04157FF5F5D8437EC7692984F Italian 64-bit 64B706910AAA1A5F50C7CF053B2465C18EDE6217F66C469FECBAEC7B293C21D9 Japanese 64-bit BCAB6D85351DAF493DE1EE5B1E73923CB46B24D8BA1B02358ECA4DCB5480DF03 Korean 64-bit 9C49E707B03CA32FB10F3FFED04D855B06AAC238A50FCAE827DCE7E852718DC2 Latvian 64-bit 7394EFA3FB999A0D7497ACA6548D7CEDF43F880B0D4BA71F710211F210DB1115 Lithuanian 64-bit 68528D1ECE001F92BE6574CAB8E0A55FB45FD3B3D905905D2EE2BD527E79072F Norwegian 64-bit 12DB26712076F29E7509B5B6393F6EF3089D6DECE660F508F7384705D54D608B Polish 64-bit 8E5C0C7D9972B1632AC32710C8081B2E80E76DAAF756153F460B827B91D12197 Portuguese (Brazilian) 64-bit 185E1D1511C092E9B53580193789C378A7344C2948DF3D6E68E7695E3C02A964 Portuguese 64-bit 5B3FB09F05A703E9C0F3BD18DEAE56E20129B1DE9C0BCCB0185A15F351E07061 Romanian 64-bit 616068F8F6857E1FA35D0B35D43421381D06F1B794C8E017C85F538C775177A2 Russian 64-bit 0812CAA1BB47BFB916EE66D34EA9A8E673CC1AA200212483FC54CED0D885FC99 Serbian Latin 64-bit D81E7C39C8AE620FAC60139D884BBEEC5573B94527DA823DF168D948F199A91D Slovak 64-bit F9B6020828C7957E2590845EEEEC2CDA7B757388BA76D0812038AC4F83812CEC Slovenian 64-bit D6F125AF2E0B7690DFBFD87E037CCBDEB87C45E5889A5F90594DF084361D4939 Spanish 64-bit 5210DEEDB54D373DCCBF4A164BE9D8A010EF867AF4FC66856443450E89119DC8 Spanish (Mexico) 64-bit F9906A938C3B1FAA3E901AB4A3E86B81F31D0BD8076FF858A845EA8F5FD68D37 Swedish 64-bit 475377D7714CE0AD4790E50693ABE09AF3BCFBD7203C47DCB50A547DB92D3D9D Thai 64-bit 72C9A870884819B0F89A1EA50F7F2E413CFC3AC00511B20EEFEBE5F1E0C90FD4 Turkish 64-bit 5408923C251599E7FD8F29784D87425B553DB5B85E11DD0658CC3F52DF698A4E Ukrainian 64-bit 8F38F2F75B2DD22675DFA85976224C64FC04F94313BA1452F7B9D65C8A4D11CA
Links valid for 24 hours from time of creation.
Links expire: {{GetProductDownloadLinksBySku.DownloadExpirationDatetime}} UTC
-
Sign in to the Volume Licensing Service Centre to download Enterprise editions.
Sign in to your subscription on the Visual Studio Subscriptions portal for available downloads.
Visit the Windows Insider site to download Insider Preview builds
*Your use of the media creation tools on this site is governed by the Microsoft Terms of Use for this website.
Validating your request. This may take several minutes. Do not refresh the page or select back, doing so will cancel the request.
